How to Retrieve a Bearer Token via API for Azure
In Azure, retrieving a bearer token allows you to authenticate and authorize API requests to Azure services securely. This guide outlines the steps to obtain a bearer token using Azure Active Directory (Azure AD) credentials and Postman.
1. Create an Azure AD Application
To begin, you need to create an Azure AD application to obtain credentials for authentication.
- Navigate to Azure Active Directory:
- Go to the Azure portal and select your Azure Active Directory.
- Register a New Application:
- Click on App registrations and then New registration.
- Provide a name for your application, choose the appropriate Supported account types (e.g., single tenant or multi-tenant), and specify a Redirect URI (this can be changed later).
- Note down the Application (client) ID and Directory (tenant) ID. These IDs are required for authentication.
2. Create a Client Secret
After registering the application, you need to create a client secret to authenticate API requests.
- Generate Client Secret:
- Navigate to your newly created AD application in the Azure portal.
- Go to Certificates & secrets and click on New client secret.
- Add a description, choose an expiry period (recommended), and click on Add.
- Note down the Value of the client secret immediately. This value is displayed only once and is required for authentication.
3. Assign Azure AD Application to Azure Resources
To grant your Azure AD application access to Azure resources (like storage accounts), follow these steps:
- Assign Role to Azure AD Application:
- Go to the resource (e.g., storage account) where you want to grant access.
- Navigate to Access control (IAM) and click on Add role assignment.
- Choose the role (e.g., “Storage Blob Data Contributor”).
- Assign access to “Azure AD user, group, or service principal” and select your AD application from the list.
4. Use API to Get the Bearer Token (Using Postman)
Now, use Postman to retrieve the bearer token for your Azure AD application.
- Configure Postman:
- Open Postman and create a new request.
- Set the request type to POST.
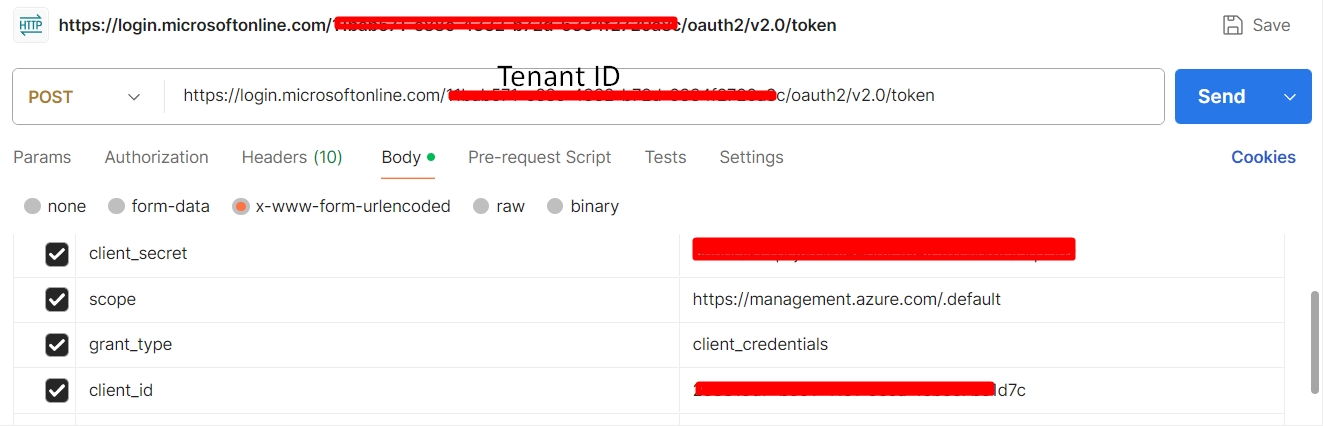
- Set Request Details:
- URL:
https://login.microsoftonline.com/{tenant-ID}/oauth2/v2.0/token- Replace
{tenant-ID}with your Directory ID obtained in step 1.
- Replace
- URL:
- Configure Body:
- Go to the Body tab.
- Choose x-www-form-urlencoded as the format.
- Add the following key-value pairs:
grant_type:client_credentialsclient_id:{Your Application (client) ID from step 1}client_secret:{Your Client Secret from step 2}scope:https://storage.azure.com/.default
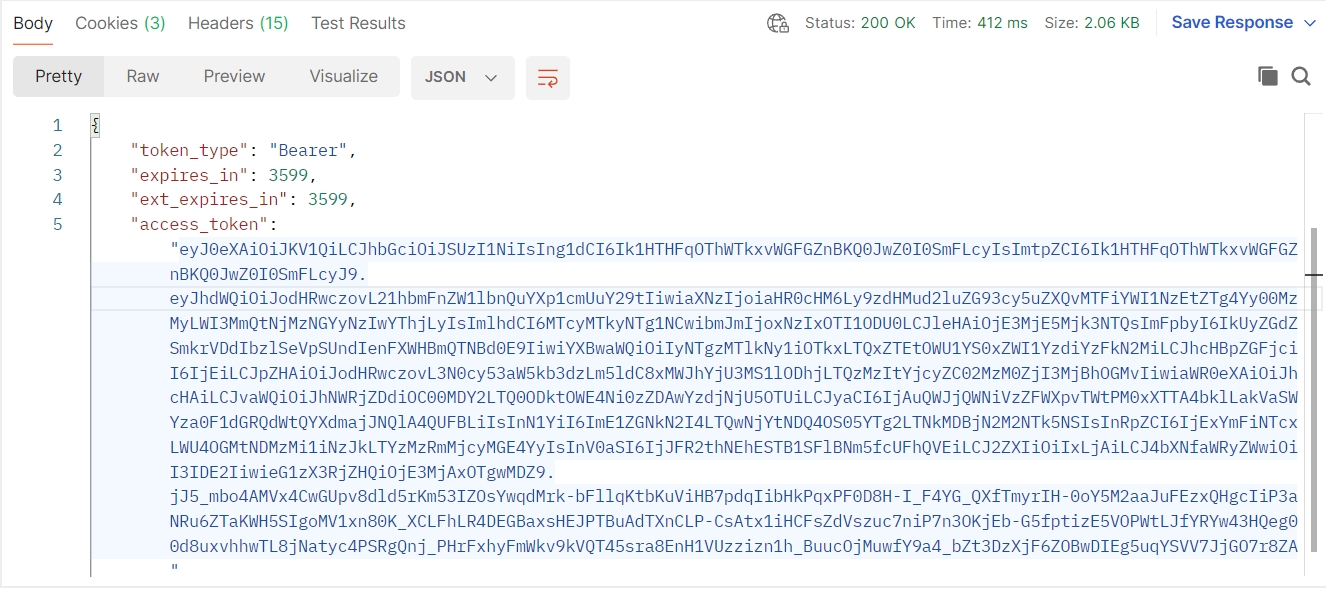
- Send Request:
- Click on Send in Postman.
- Postman will send the request to Azure AD token endpoint.
- The response will contain an access token. Copy this token for subsequent API requests.
5. Validate the Token
After obtaining the access token, you can validate its correctness by decoding its claims or using it in authorized API requests to Azure services, such as Azure Storage.
Conclusion
In summary, retrieving a bearer token via API for Azure involves creating an Azure AD application, generating client credentials, assigning appropriate roles, and using tools like Postman to obtain and validate the token. This process ensures secure authentication and access to Azure resources through APIs.
By following these steps, you can integrate Azure AD authentication seamlessly into your applications and securely interact with Azure services via APIs. Adjustments may be needed based on specific Azure configurations or security policies in your organization.